Ladybug Drawing - Simple Steps For Anyone
Have you ever felt a little tug, a quiet wish, to capture the charm of a tiny ladybug on paper? Perhaps you've seen those wonderful pictures, the ones that seem to pop right off the page, and thought, "I could never do that." Well, you know, this particular guide is here to show you that bringing one of these sweet little creatures to life with your own hands is more within reach than you might think. It's actually a pretty straightforward path to creating something truly lovely.
So, we're going to walk through the process together, taking it one gentle step at a time. You really don't need a whole studio full of fancy supplies, just some basic items that you probably have lying around the house. It's about finding that calm space, that quiet moment, where you can simply enjoy the act of making something with your hands. We're aiming for a relaxed, enjoyable time, where the focus is on the journey of creation, rather than any pressure to be a master artist right from the start.
This approach, you see, is built on the idea that art, especially something like a ladybug drawing, should feel like a discovery, not a chore. We want you to feel a sense of accomplishment, a quiet pride in what you've made, and maybe even a little bit of wonder at how easily it all came together. It's quite a satisfying feeling, honestly, to watch a simple shape transform into something recognizable and sweet, just by following a few clear directions. We're here to make that happen for you.
Table of Contents
- What Do You Need for Your Ladybug Drawing?
- Is a Realistic Ladybug Drawing Hard to Do?
- How Can Kids Start Their Ladybug Drawing?
- What Are the First Shapes for a Ladybug Drawing?
- Bringing Your Ladybug Drawing to Life with Color
What Do You Need for Your Ladybug Drawing?
You might be wondering, you know, about the tools and materials you'll want to have close by as we get started on this creative adventure. The really good news is that you don't need anything particularly special or hard to find. For a ladybug drawing, the essential items are quite simple, almost universally available, which is pretty convenient. We're talking about things you likely already have tucked away in a drawer or a craft box somewhere in your home.
So, first off, you'll want a pencil. Any regular graphite pencil will do the trick, honestly. Something that feels comfortable in your grip, allowing you to make light marks at first, and then perhaps a little darker as you become more sure of your lines. It's really about having a tool that responds to your touch, letting you sketch out those initial shapes without too much commitment. A standard writing pencil, you see, works perfectly for this kind of creative pursuit, letting you get a feel for the form of your ladybug drawing.
Next up, you'll definitely need a piece of paper. This can be any kind of paper, really. A blank sheet from a sketchbook, a piece of printer paper, or even the back of an envelope if that's what's handy. The surface you choose is, in a way, your blank canvas, ready to receive the first tentative lines of your ladybug drawing. It's a place for ideas to take shape, for your vision to become something tangible. There's something quite liberating about starting with a fresh, empty sheet, isn't there?
And then, just in case, it's often a good idea to have an eraser close by. Not because you'll make mistakes, but because drawing is often a process of refinement, of trying out a line and then adjusting it a little. An eraser is your friend in this, letting you gently remove a mark that isn't quite right, or lighten an area before you add more detail. It's a tool for exploration, you know, allowing you to experiment with different curves and angles for your ladybug drawing without any lasting worries. It makes the whole experience a bit more relaxed, actually.
For those who might want to add a splash of vibrancy, perhaps some colored pencils could be a nice addition later on. While not strictly necessary for the initial drawing, they can bring your ladybug drawing to life with those familiar reds and blacks. We're thinking about a set of Prismacolor, Derwent Lightfast, or Caran d'Ache Lu pencils, if you happen to have them, or really any set that lets you add some rich, smooth color. It's a way to give your creation that extra bit of visual pop, to make it truly shine, you know.
Is a Realistic Ladybug Drawing Hard to Do?
When you first look at a really well-done ladybug drawing, especially one that captures a lot of the fine points, it's easy to think, "Oh, that must be incredibly tricky to pull off." It seems, in a way, like something only someone with years of practice could manage. But here's the honest truth: even though it might appear quite involved, it's actually not nearly as difficult as you might imagine. The secret, you see, is in breaking it down into smaller, more manageable parts.
A lot of the time, the idea of drawing something "realistic" can feel a bit overwhelming. You might worry about getting every tiny detail just right, or about making it look exactly like the real thing. But for a ladybug drawing, the process is structured in a way that guides you through each stage, making it feel less like a huge task and more like a series of simple steps. It's about building up the image gradually, adding one element at a time, until the whole picture comes together quite naturally.
So, you know, we're not asking you to be an art school graduate right away. This particular method is designed to be very approachable, allowing anyone to follow along and achieve a pleasing result. It's really about understanding that even what looks like a complex image is just a collection of simpler shapes and lines that are put together in a specific order. Once you grasp that, the entire process of creating a ladybug drawing becomes a lot less intimidating, honestly.
The beauty of this kind of learning, you see, is that it takes something that might seem a bit advanced and makes it completely accessible. You'll find that as you go through the stages, each step makes perfect sense, building on the one before it. It’s a very gentle progression, almost like putting together a puzzle piece by piece. Before you know it, you’ll have a ladybug drawing that looks surprisingly true to life, and you'll realize it wasn't a huge challenge after all.
Breaking Down the Ladybug Drawing Process
To really get a handle on creating your ladybug drawing, we're going to look at it as a series of very clear, distinct actions. Think of it less as one big drawing and more as a collection of smaller, easier tasks that, when combined, make up the complete picture. This way of thinking about it tends to make the whole process feel much more achievable, honestly, removing any sense of being overwhelmed by the final goal.
We'll start with the very first mark you make on the paper, and then we'll move all the way to the last little dot. This method ensures that you're always building on a solid foundation, adding details and refinements only when the main structure is already in place. It's a very logical flow, you know, almost like telling a story with your pencil, where each sentence leads naturally to the next. This progressive approach is key to making a ladybug drawing feel simple.
This drawing lesson, you see, will show you how to create a ladybug in just six easy steps. Each of these steps is designed to be straightforward, giving you clear instructions for what to do next. It's not about guessing or struggling; it's about following a clear path that has been laid out for you. This free and easy step-by-step ladybug drawing lesson progressively builds upon each previous action, ensuring you're always moving forward with confidence. You'll find it's a very satisfying way to learn.
The entire process is designed to be quite simple, really. You'll notice that the instructions are broken down into bite-sized pieces, making it easy to follow along at your own pace. There's no rush, no pressure, just a calm, guided experience. This kind of structured approach is what makes even a seemingly complex ladybug drawing accessible to pretty much anyone who wants to give it a try. It's about clarity and ease, above all else.
How Can Kids Start Their Ladybug Drawing?
You know, for younger artists, the idea of drawing something that looks real can be incredibly exciting, but sometimes a little daunting too. The good news is that this specific approach to a ladybug drawing is simple enough for kids to follow along with ease. We've made sure that the directions are clear and friendly, focusing on shapes and lines that are easy for small hands to manage, which is pretty important for building confidence.
This guide offers instructions for drawing a simple ladybug specifically with kids in mind. It's about making art an enjoyable, stress-free activity, where the main goal is to have fun and see what you can create. We believe that everyone, no matter their age, should feel empowered to pick up a pencil and express themselves. So, you see, this ladybug drawing method is crafted to be very encouraging for children, letting them explore their creative side without any fuss.
Whether your child is in kindergarten, first grade, or second grade, they can absolutely learn how to create a ladybug drawing using these easy and free instructions. The steps are presented in a way that respects their developmental stage, focusing on clear visuals and straightforward actions. It's about building those early drawing skills in a positive and supportive way, making sure they feel successful at each turn. This kind of positive experience is really valuable, honestly, for fostering a love of making things.
Simple Ladybug Drawing for Younger Artists
For really young artists, the instructions for a ladybug drawing are made to be incredibly simple, focusing on basic shapes and movements that are easy to grasp. We understand that keeping things uncomplicated is key for little ones, so we've stripped away any unnecessary complexities. It's about providing a clear path, you know, for them to follow, allowing them to feel capable and proud of their efforts.
Today, for example, drawing123.com will show you how to create the ladybug, starting with just a few fundamental lines. This particular method emphasizes clarity and directness, ensuring that children can easily follow along without getting lost or frustrated. It's about building their confidence with every stroke, showing them that they can indeed bring their ideas to life on paper. A simple ladybug drawing is, in a way, a perfect starting point for their artistic journey.
There are also step-by-step instructions available that are perfect for really young artists. These are designed to be visually clear and easy to understand, even for those who are just beginning their drawing adventures. You might even find a video to watch, which can be super helpful, you know, as it shows each step in action. And, you can download the free steps to keep handy, making it even simpler to reference as they work on their ladybug drawing.
This tutorial, you see, is simple enough for kids to pick up and run with. It doesn't require any prior drawing experience, just a willingness to try and a little bit of patience. The goal is to make the process of creating a ladybug drawing enjoyable and accessible for everyone, especially the youngest members of your family. It's about sparking that creative interest and showing them what they're capable of achieving with just a few simple tools.
What Are the First Shapes for a Ladybug Drawing?
When you're ready to actually put pencil to paper for your ladybug drawing, the very first thing you'll want to do is create a basic form that will serve as the foundation. This initial shape is incredibly important, as it sets the stage for everything else that follows. It's about getting the overall size and placement just right before you start adding any of the finer points. So, you know, this first step is all about setting yourself up for success.
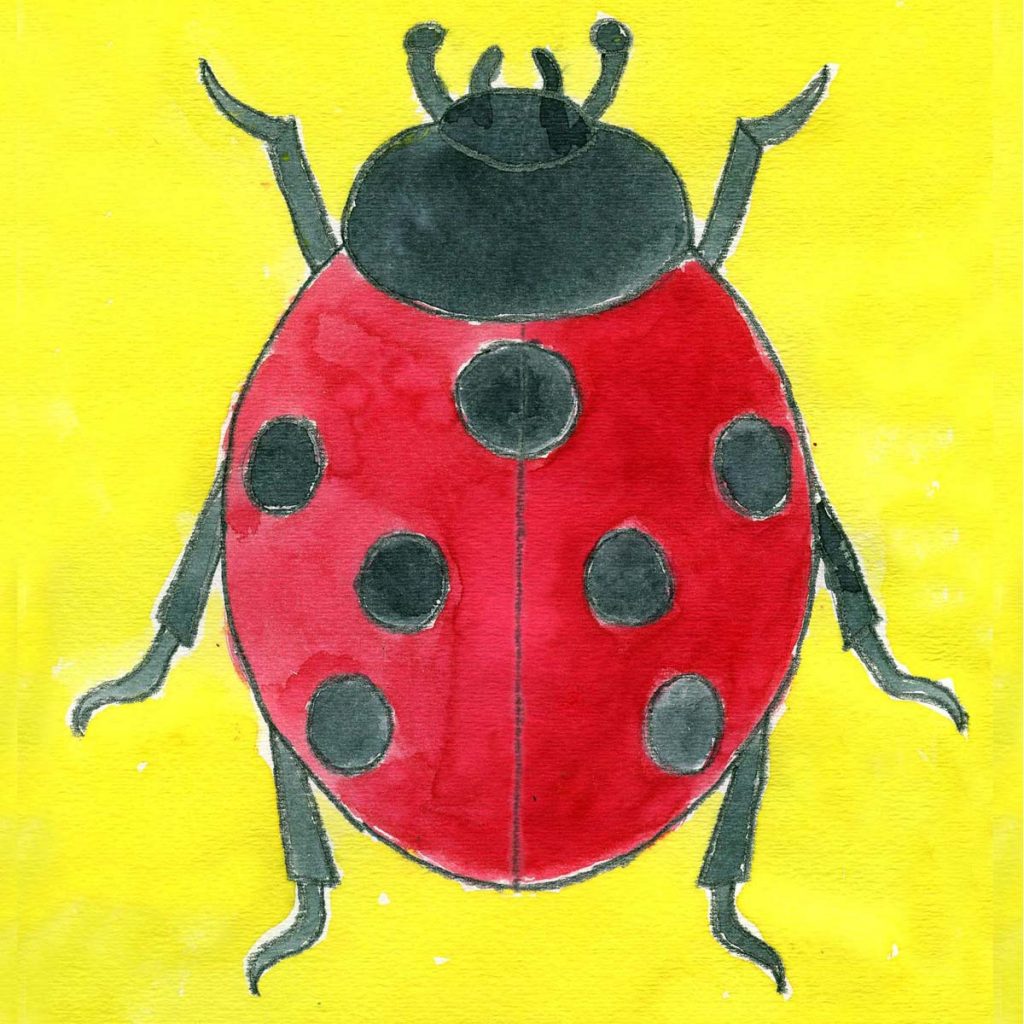
First, you'll want to draw an oval to form the body. Think of it as a gentle, rounded shape, a bit like an egg lying on its side, or perhaps slightly more circular depending on the kind of ladybug drawing you envision. This oval doesn't have to be perfect, honestly, just a light outline that gives you a general idea of where the ladybug's main body will sit on your paper. It's the starting point, the very beginning of your creature taking shape.
This oval is, in a way, the anchor for your entire ladybug drawing. It helps you determine the proportions and ensures that the rest of the body parts will fit together harmoniously. You might want to sketch it very lightly at first, just barely touching the paper with your pencil, so that you can easily adjust its size or position if needed. It's a foundational element, you see, and getting it right sets a good tone for the rest of your creative work.
Building the Basic Form for Your Ladybug Drawing
Once you have that initial oval down for your ladybug drawing, you've already made a significant start. This simple shape is, in fact, the most crucial part of building the basic form. It's from this point that all other elements will extend, making the entire creature feel cohesive and well-proportioned. It's quite amazing, really, how much can spring from such a humble beginning.
From this core oval, you'll then begin to add other basic shapes and lines that connect to it, gradually giving your ladybug drawing more definition. Perhaps a smaller, more rounded shape for the head, or gentle curves for the wings that sit atop the main body. It’s a process of adding one simple form after another, each one contributing to the overall structure. This method helps to ensure that everything remains in balance, making the drawing feel natural.
This free and easy step-by-step ladybug drawing lesson progressively builds upon each previous step, meaning that once you have that oval, the next instruction will guide you on what to add next. It’s a very logical progression, designed to make the drawing process feel intuitive and straightforward. You'll find that as you add each new element, your ladybug drawing starts to truly come alive on the page, which is pretty satisfying.
So, you know, whether you're aiming to draw a classic ladybug or perhaps even one from a movie like "Miraculous Ladybug," this tutorial provides a solid framework. It’s about understanding the fundamental shapes that make up these creatures, allowing you to adapt the basic principles to different styles. Learning how to draw a ladybug by this tutorial is helpful for kids and adults alike, offering a clear path to creating your very own little bug friend.
Bringing Your Ladybug Drawing to Life with Color
After you've carefully sketched out the shapes and lines of your ladybug drawing, getting all the details just right, there often comes a moment when you want to give it that extra bit of sparkle, that true-to-life look. This is where adding color can really make your creation pop off the page, giving it vibrancy and depth. It's a chance to truly personalize your artwork, you know, and make it uniquely yours.
For many, this means reaching for colored pencils to bring those familiar hues to your ladybug drawing. Imagine those bright, cheerful reds for the shell, and the deep, rich blacks for the spots and head. Using colored pencils allows for a lot of control, letting you layer colors and blend them to achieve different effects, from a soft sheen to a more intense, bold appearance. It's a very satisfying way to finish off your piece, honestly, adding that final touch of character.
You might consider using specific types of colored pencils, like Prismacolor, Derwent Lightfast, or Caran d'Ache Lu, if you happen to have them. These brands are known for their rich pigments and smooth application, which can really elevate the look of your ladybug drawing. However, any set of colored pencils that you enjoy working with will do the job beautifully. The most important thing is to have fun with the process and let your creativity guide you.
This part of the process is where your ladybug drawing truly gains its personality. It’s about making choices about light and shadow, about how the colors interact to give the impression of a rounded, three-dimensional form. You might even experiment with a little bit of shading to give the spots a slight curve, or to make the shell appear shiny. It's a wonderful opportunity, you see, to add that extra layer of visual interest, transforming your line drawing into something wonderfully complete.
So, we've explored how to approach a ladybug drawing, starting from those very first light lines and building up to a detailed, perhaps even colored, image. We talked about how it's really not as hard as it might seem, even for younger artists, and how breaking it down into simple, manageable steps makes all the difference. We also looked at the basic tools you'll need and how those initial shapes form the foundation for everything else. It’s all about taking it one step at a time, making the process enjoyable and accessible for anyone who wants to try their hand at creating these charming little creatures on paper.


Detail Author:
- Name : Rebeka Weimann
- Username : mann.ethan
- Email : jake65@beer.com
- Birthdate : 1989-05-21
- Address : 630 Gage Pike Suite 142 North Herman, NJ 08561-8458
- Phone : 1-269-669-6316
- Company : Olson PLC
- Job : Engineering Technician
- Bio : Nulla repellat rerum quae dignissimos libero. Similique sunt est odio placeat. Ipsa doloremque consequatur officiis et qui nihil.
Socials
facebook:
- url : https://facebook.com/laney_xx
- username : laney_xx
- bio : Qui beatae quia corporis aperiam quia. Omnis minima sint ipsam quidem quis.
- followers : 1950
- following : 124
tiktok:
- url : https://tiktok.com/@laney.walker
- username : laney.walker
- bio : Provident soluta quidem esse molestiae harum ut maxime.
- followers : 3714
- following : 2083
twitter:
- url : https://twitter.com/laney.walker
- username : laney.walker
- bio : Maiores repudiandae voluptas voluptas nobis ut. Delectus dolore in tenetur odit reiciendis molestias. Reiciendis rerum quam saepe nulla in.
- followers : 345
- following : 690
instagram:
- url : https://instagram.com/laneywalker
- username : laneywalker
- bio : Voluptate adipisci nostrum dicta cum. Veritatis illum assumenda corrupti eligendi officiis quam.
- followers : 3660
- following : 230
